Learn how to capture the best moments from your favorite Twitch streamers with this comprehensive guide on how to make clips on Twitch. Save and share highlights on desktop or mobile!
Discover the thrill of capturing the best moments from your favorite Twitch streams with our easy-to-follow guide on creating clips on Twitch. Whether you’re on desktop or mobile, you’re just a few clicks away from saving and sharing the highlights that matter most to you and your community.
In the bustling world of Twitch streaming in 2024, clips have become more than just short snippets of video; they’re the heartbeats of memorable experiences, shared laughs, and jaw-dropping gameplay. As an integral part of the Twitch community, whether you’re tuning in as a viewer or broadcasting as a streamer, mastering the art of clipping empowers you to hold onto and share these moments, making sure they never fade into the digital ether.
This guide is your go-to resource for capturing everything from epic victories to hilarious fails, ensuring you can relive and share these moments with ease. By breaking down the process into simple steps, we’ll help you turn your livestream viewings into a treasure trove of shareable gems, enhancing your Twitch experience and connecting you more deeply with the community.
The Basics of Twitch Clips
Creating a clip on Twitch allows you to capture up to 60 seconds of a live stream or past broadcast, highlighting moments you or your audience will want to revisit. Whether it’s an incredible play, a funny mishap, or a particularly engaging piece of commentary, clipping on Twitch lets you distill the essence of a stream into shareable snippets.
Creating Clips on Desktop
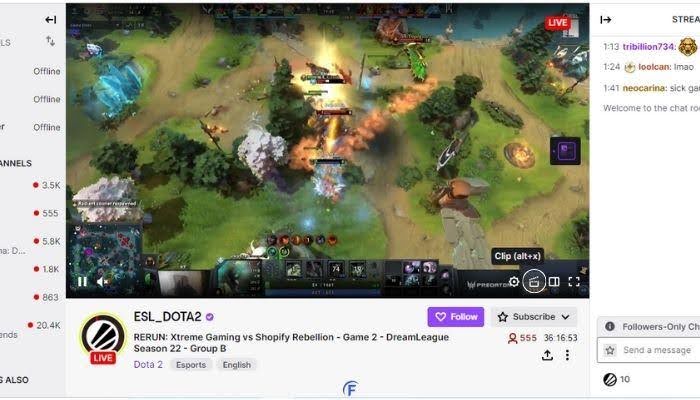
To start clipping on Twitch from your desktop, find a stream and prepare to capture the moment. When something clip-worthy happens, click the clip button—resembling a movie clapperboard—at the bottom of the stream. This icon is your gateway to creating memorable Twitch clips.
Step 1: Click the Clip Button
Hover your cursor over the stream and look for the clip feature icon. Clicking this or using the keyboard shortcut (Alt + X for Windows or ⌥ + X for Mac) will automatically capture the last 60 seconds of the stream.
Step 2: Trimming Your Clip
In the clip editing interface, you’ll have the opportunity to trim your clip, selecting the exact segment you want to highlight. This is your chance to focus on the moment you want to clip, ensuring it captures the essence of what you found engaging.
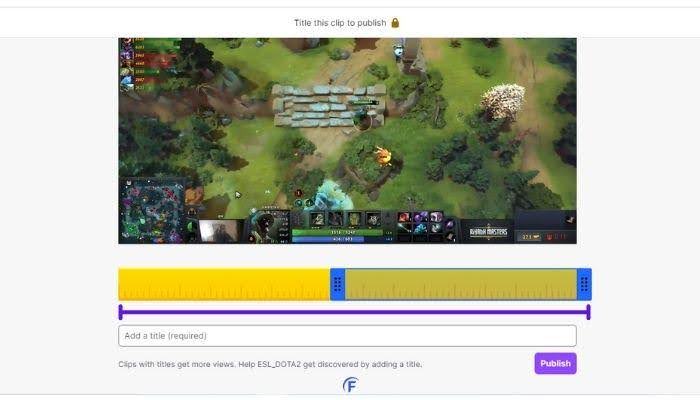
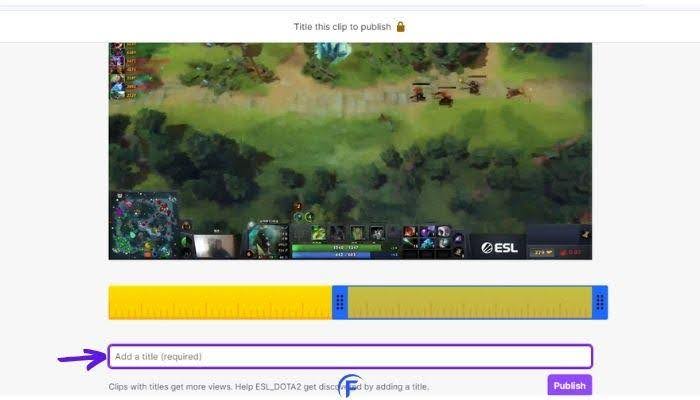
Step 3: Adding a Title and Publishing
Once you’ve trimmed your clip, add a title to provide context and intrigue. This title should reflect the content of your clip, enticing others to watch. When you’re satisfied, click the “Publish” button to share your clip with the world.
Clipping on Mobile
The process of creating clips on Twitch is just as straightforward on mobile. Whether you’re using an iOS or Android device, you can capture moments on the go with just a few taps.
Step 1: Find Your Moment
On the Twitch app, navigate to the stream you’re watching. When a clip-worthy moment arises, tap the screen to reveal the on-screen options.
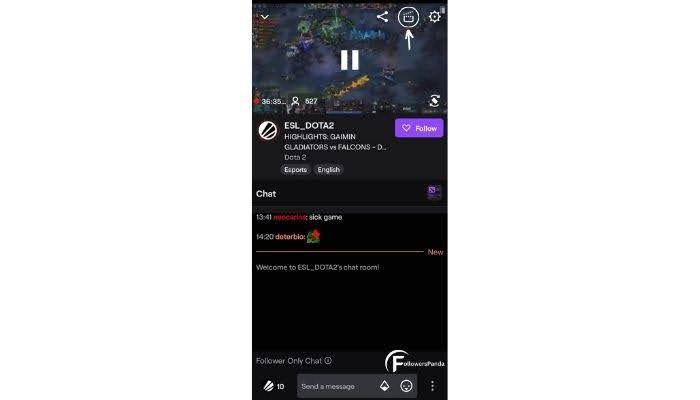
Step 2: Tap to Clip
Look for the clapperboard icon at the top of the stream and tap it. This action will automatically create a clip from the last 60 seconds of the broadcast.
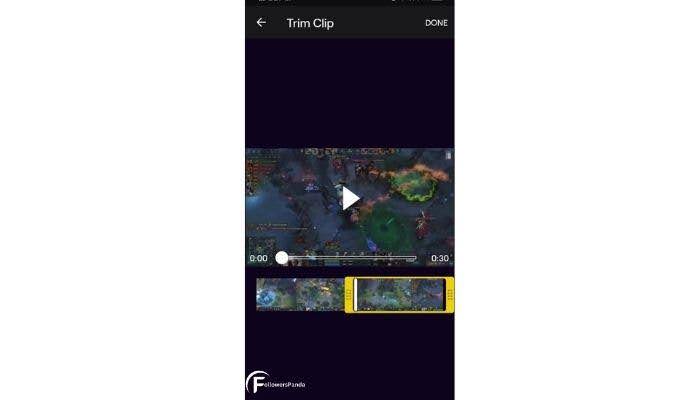
Step 3: Edit and Share
After tapping, you’ll be taken to a screen where you can trim the clip and add a title. Once you’re happy with your clip, tap “Publish” to share it with the Twitch community. You can also download the clip to your device for sharing on other platforms.

Managing Your Clips
Whether you’re clipping from a PC or mobile, managing your clips is an integral part of the process. Use the Creator Dashboard to edit, delete Twitch Clip, or further refine your clips, ensuring your channel only showcases the best moments.
Sharing Your Creations
Once you’ve created a clip, sharing it across social media platforms is a breeze. Navigate to the clip you want to share from the Creator Dashboard and use the share option to post it on platforms like Twitter, Facebook, and more. Sharing your Twitch clip is an excellent way to engage with your audience off Twitch and bring more visibility to the moments you’ve captured.
Conclusion
Making a clip on Twitch is an easy and powerful way to capture and share the highlights of a stream. Whether you’re looking to preserve a moment for yourself, share something funny or incredible with your friends, or curate content for your channel, the clipping feature is an indispensable tool. With this guide, you’re well-equipped to start clipping and sharing the very best of Twitch streaming.
FAQs
How can I delete Twitch clips?
From the Creator Dashboard, go to the “Content” tab, find the clip you want to delete, and use the delete option.
Can I edit clips after publishing?
You can’t alter the content of a clip once it’s published, but you can change its title or delete it if necessary.
Is there a limit to how many clips I can make?
Twitch doesn’t set a strict limit, but it’s crucial to use the feature thoughtfully to avoid spamming your followers.
Can I make clips from someone else’s Twitch stream or only from my own broadcasts?
Yes, you can make clips from any public Twitch stream, not just your own broadcasts. This lets you capture and share great moments from all over Twitch.
How do I find clips made by others from a specific Twitch stream or channel?
To find clips from a specific stream or channel, visit the channel’s page on Twitch. Look for a “Clips” section where you can see popular or recent clips made by the community from that streamer’s content.